Atlas Behaviour Map
What is the Behaviour Map?
The Atlas Behaviour Map (also called the Test Tree Map) displays the pathways covered by your SmartTests. Each test is represented as a pathway, with steps in the test as nodes. The tree displayed is the aggregate of the pathways for the tests in the folder scope selected in the top right corner.
Understanding the Map Structure
- Nodes: Each node represents a test step with its canonical command (e.g., "click button", "fill input", "navigate to page")
- Edges: Edges connect nodes to show the sequence of steps in your tests
- Screen-State Information: Nodes may display screen and state information if ExploreChimp has been run on those pathways
- Test Association: Nodes show which tests pass through or end at that step
How to View and Use the Map
- Navigate to Atlas → Behaviour Map
- Select a folder or test scope using the folder selector in the top right corner
- The map displays all pathways for tests within the selected scope
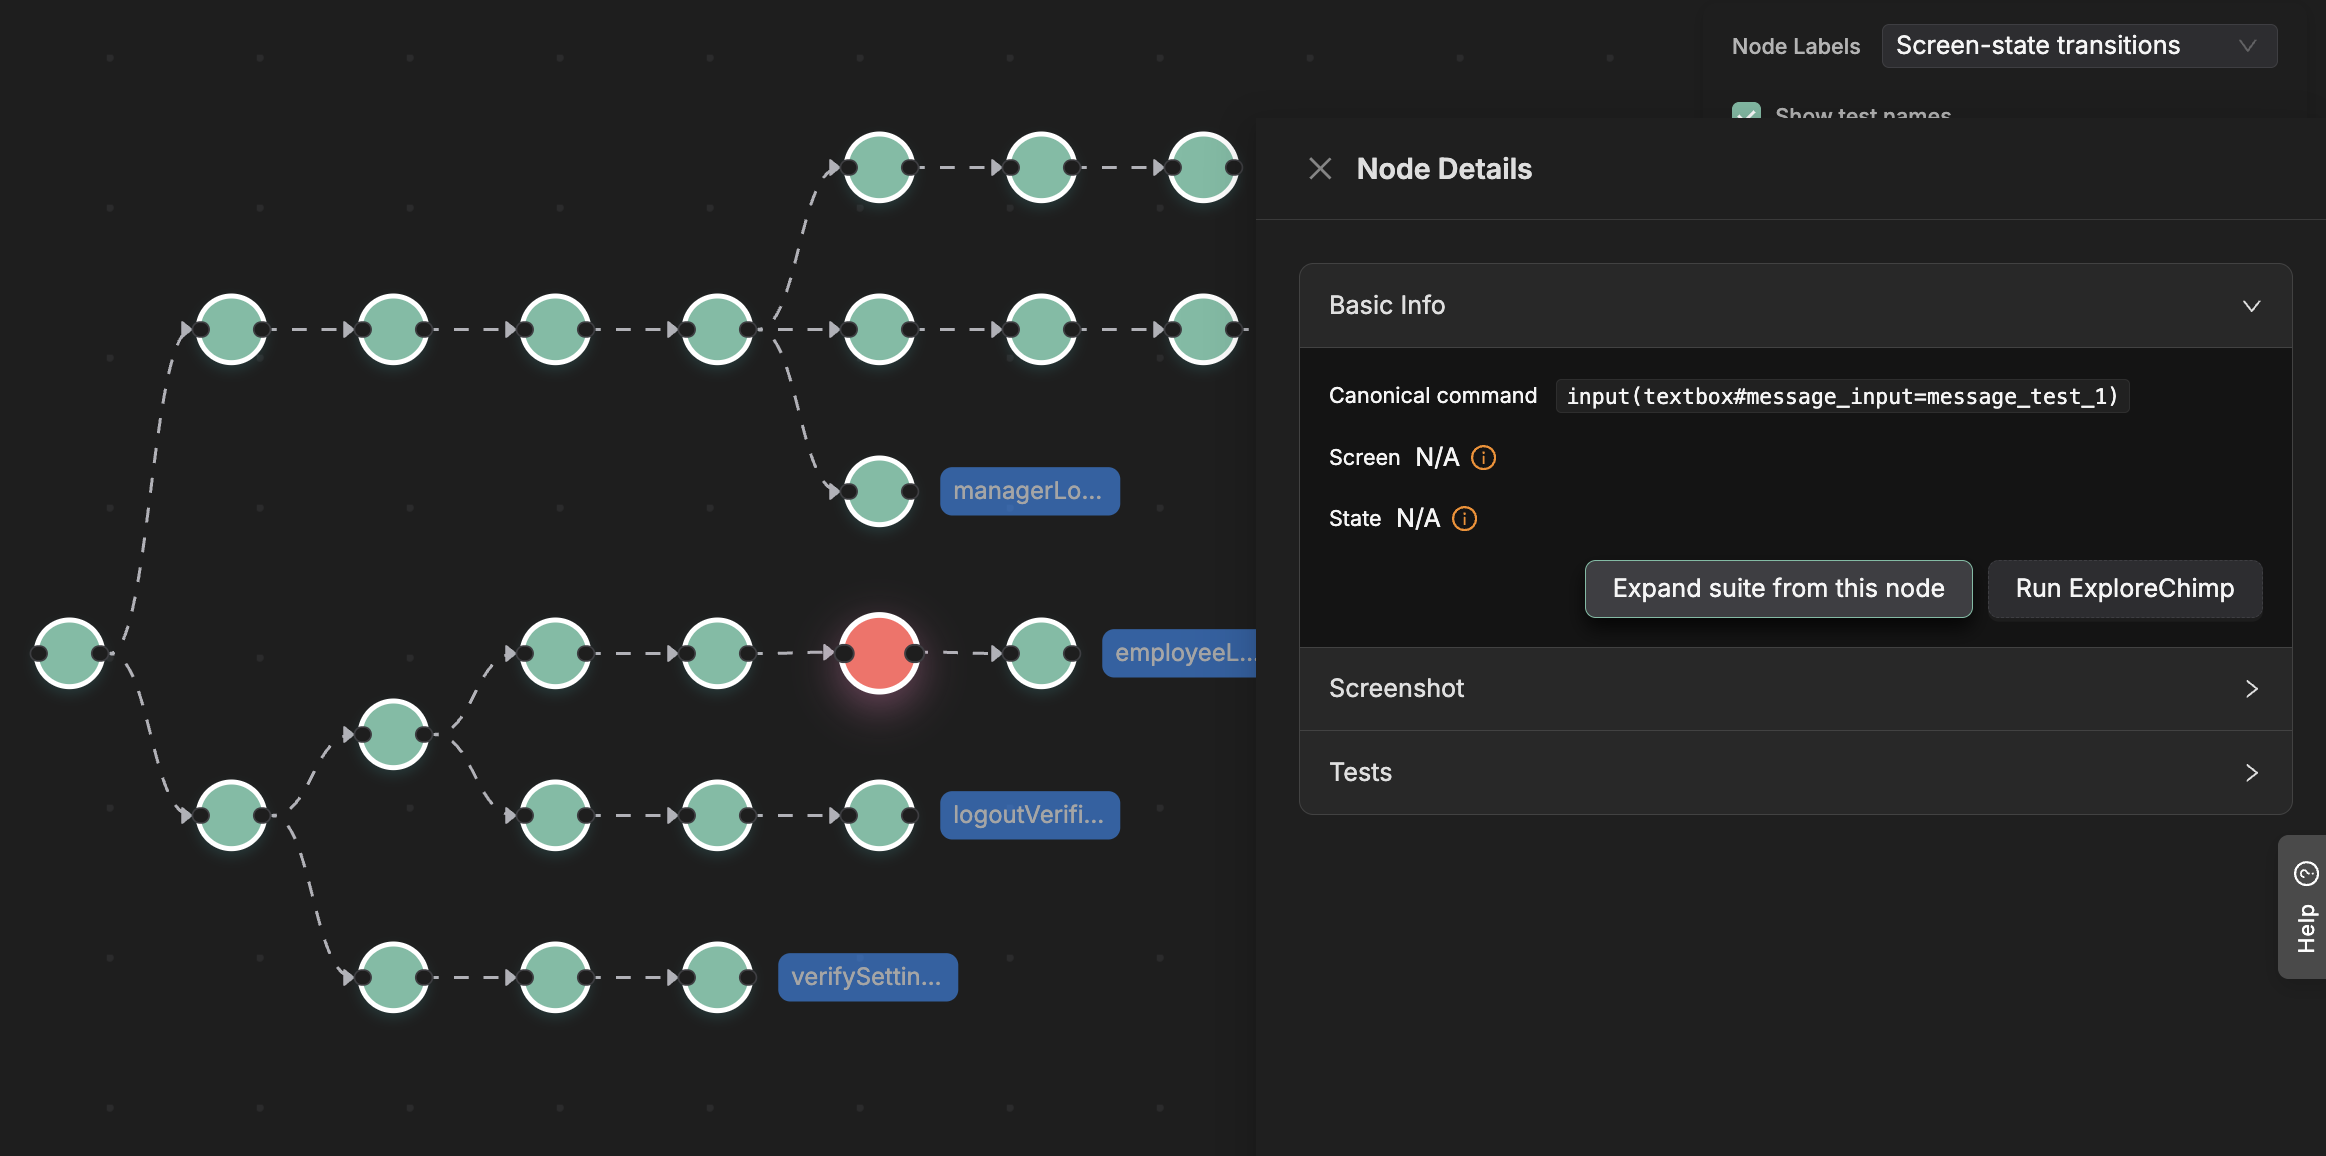
- Click on any node to open a drawer with detailed information:
- Basic Info: Canonical command, screen, and state (if available)
- Screenshot: Screenshot captured at this step (if ExploreChimp has been run)
- Tests: Lists which tests pass through this node and which tests end here
Use Cases
Viewing Coverage Pathways Visually
The Behaviour Map helps you:
- See test coverage: Understand which parts of your app are covered by tests
- Identify gaps: Spot areas that lack test coverage
- Understand flows: Visualize how users navigate through your application
- Track changes: See how test coverage evolves over time
Expanding Test Suite from a Given Test Node
- Click on a node in the Behaviour Map to open the drawer
- Click "Expand suite from this node" button
- TestChimp will analyze the node and suggest alternate branches or test scenarios
- Review the suggested branches in the modal:
- Select which branches to include
- Add custom branches if needed
- Optionally specify a focus area for more targeted suggestions
- Generate a test plan and execute it to create new tests that expand coverage from that node
Note: Test suite expansion uses a journey plan based exploration recipe internally. This recipe guides ExploreChimp through the generated test plan, which includes journeys that explore alternate branches and test scenarios from the selected node. The agent follows these journeys to discover new pathways and create additional SmartTests that expand your test coverage.
Running ExploreChimp on a Specific Area
- Click on a node in the Behaviour Map to open the drawer
- Click "Run ExploreChimp" button
- A modal will appear showing all tests that pass through or end at that node
- Select which tests you want ExploreChimp to follow
- Configure the exploration (number of journeys, bug sources to analyze, etc.)
- ExploreChimp will run guided by the selected tests, analyzing data sources (DOM, Screenshot, Network, Console, etc.) to identify issues and capture screen-state information for the pathway
Note: If a node shows "N/A" for screen or state information, it means ExploreChimp hasn't indexed that path yet. Running ExploreChimp will capture these details and update the map.