How to Find Duplicate Tests in a Playwright Suite (Semantic Graph for Agentic QA)

TL;DR: When coding agents can write dozens of Playwright tests in a single session, the bottleneck shifts from authoring to governance: are the new tests distinct and useful, or just near-duplicates of what you already have? Semantic Graph is a free, open-source CLI that scans your suite, embeds each test semantically, clusters related tests, and renders an interactive graph so you—and your agent—can spot redundancy before it compounds.
The new problem: agents author tests en masse
For most of the last decade, the hard part of E2E testing was throughput: humans could not write and maintain enough tests to keep up with product velocity.
That constraint is collapsing. With Claude Code, Cursor, and agent skills like the TestChimp skill, a single prompt can produce a folder of well-formed Playwright specs in minutes. Coverage gaps that used to take a sprint to close can shrink to an afternoon.
The bottleneck has moved.
| Era | Primary constraint | What "good" looked like |
|---|---|---|
| Manual QA | Authoring speed | Enough tests to cover the happy path |
| Human + low-code tools | UI-layer setup friction | Stable POMs, fewer flakes |
| Agentic QA | Suite quality at scale | Distinct, high-signal tests—not copies |
When an agent is rewarded for adding tests—closing coverage gaps, responding to PR feedback, or filling in scenarios from a test plan—it has no innate sense of "this already exists, slightly reworded." Left unchecked, suites balloon with:
- Duplicate tests that assert the same behaviour under different titles
- Near-duplicates that differ only in fixture data or selector phrasing
- Clustered redundancy where five tests all exercise the same checkout edge case
- Invisible overlap across folders, because no human (and no agent) holds the entire suite in working memory
This is the QA equivalent of boiling the lake in the wrong direction: lots of heat, little new coverage. Worse, duplicate tests inflate CI time, confuse failure triage, and give a false sense of depth—your line count grows while your behavioural breadth stalls.
The question is no longer "Can we write more tests?" It is:
"Are we writing useful, distinct tests—or just duplicative ones?"
That question needs a semantic answer, not a filename diff.
What is Semantic Graph?
Semantic Graph is an open-source tool from TestChimp that maps your Playwright test suite by meaning, not syntax.
It is published as @testchimp/semantic-graph on npm and lives in the TestChimp/semantic-graph repository. Run one command against your tests directory; the CLI:
- Scans
*.spec.ts,*.test.ts, and related Playwright files - Parses each test's suite path, title, intent comments, scenario annotations, and body
- Embeds the canonical test text with an embedding model (OpenAI or Voyage AI)
- Clusters tests by semantic similarity using DBSCAN
- Lays out a 2D graph with UMAP so similar tests appear close together
- Names clusters with a lightweight LLM pass (e.g. "auth", "checkout", "api-contracts")
- Serves a local interactive UI at
http://localhost:3859
No database. No TestChimp account required. Embeddings are computed in memory each run—ideal for local audits, pre-merge reviews, or giving an agent a structural view of the suite before it authors more tests.
How it works (the pipeline)
Understanding the pipeline helps you interpret the graph—and tune how agents use it.
1. Parse tests into embedding-ready text
The core library (@testchimp/semantic-graph-core) includes a vendored Playwright-aware parser. For each test it builds canonical text:
Suite: checkout > guest flow
Test: rejects expired coupon at payment step
Body:
Scenario: Guest checkout with invalid coupon
// intent: verify error copy and no charge created
await page.goto('/checkout');
...
Parsing captures intent comments and scenario annotations—the same metadata agents should be authoring anyway when following requirement traceability conventions. Two tests with different selectors but the same intent will land close together in embedding space.
2. Embed with cosine similarity
Each test's text is sent to an embedding API in batches (default model: text-embedding-3-small for OpenAI, voyage-4 for Voyage). The tool computes cosine similarity between vectors and applies configurable thresholds:
| Signal | Default threshold | Meaning |
|---|---|---|
| Graph edge | ≥ 0.75 | Tests are semantically related |
| Similar | ≥ 0.80 | Worth reviewing together |
| Potential duplicate | ≥ 0.92 | Strong dedup candidate |
These thresholds mirror how humans judge redundancy: not byte-identical, but "would a failure in one make the other pointless?"
3. Cluster with DBSCAN
Similar embeddings are grouped with DBSCAN density clustering—no need to pick k clusters upfront. Each cluster gets an LLM-generated label (e.g. "settings-page", "admin-tasks") so the legend is readable at a glance.
4. Visualize with UMAP + D3
A seeded UMAP projection maps high-dimensional embeddings to 2D coordinates. The bundled UI (built with D3.js) renders:
- Graph view — nodes as tests, edges as similarity links; click a node to see nearest neighbours and duplicate flags
- Clusters view — grouped list with colour-coded legend
- Folder tree — scope the graph to a directory or single file
Zoom into tests/checkout/ before a refactor. Scan the whole suite before a release. Hand the URL to an agent and ask it to propose merges.
Why this matters for agentic QA workflows
Semantic Graph is not a replacement for TrueCoverage—production-informed prioritization—or requirement traceability. It solves a orthogonal problem: intra-suite redundancy.
Here is where it fits in a modern agent loop:
Before the agent writes
Run Semantic Graph and attach the cluster summary to the agent's context. Instructions become concrete:
"We already have four tests in the checkout cluster covering coupon validation. Do not add another unless you are testing a different failure mode."
This is cheaper and more reliable than asking the agent to grep test titles.
After the agent writes
Re-run the graph on the PR branch. New nodes that snap onto existing clusters—or spike duplicate scores above 0.92—are review flags. Pair with CI the same way you gate on lint or coverage deltas.
During suite health reviews
Quarterly "suite diet" sessions used to mean spreadsheets and gut feel. Now: filter to clusters with high internal similarity, merge or delete, and measure CI time recovered.
Complement to production signals
TrueCoverage tells you what behaviours users need tested. Semantic Graph tells you whether your existing tests are saying the same thing twice. Both are necessary for a suite that is broad and lean.
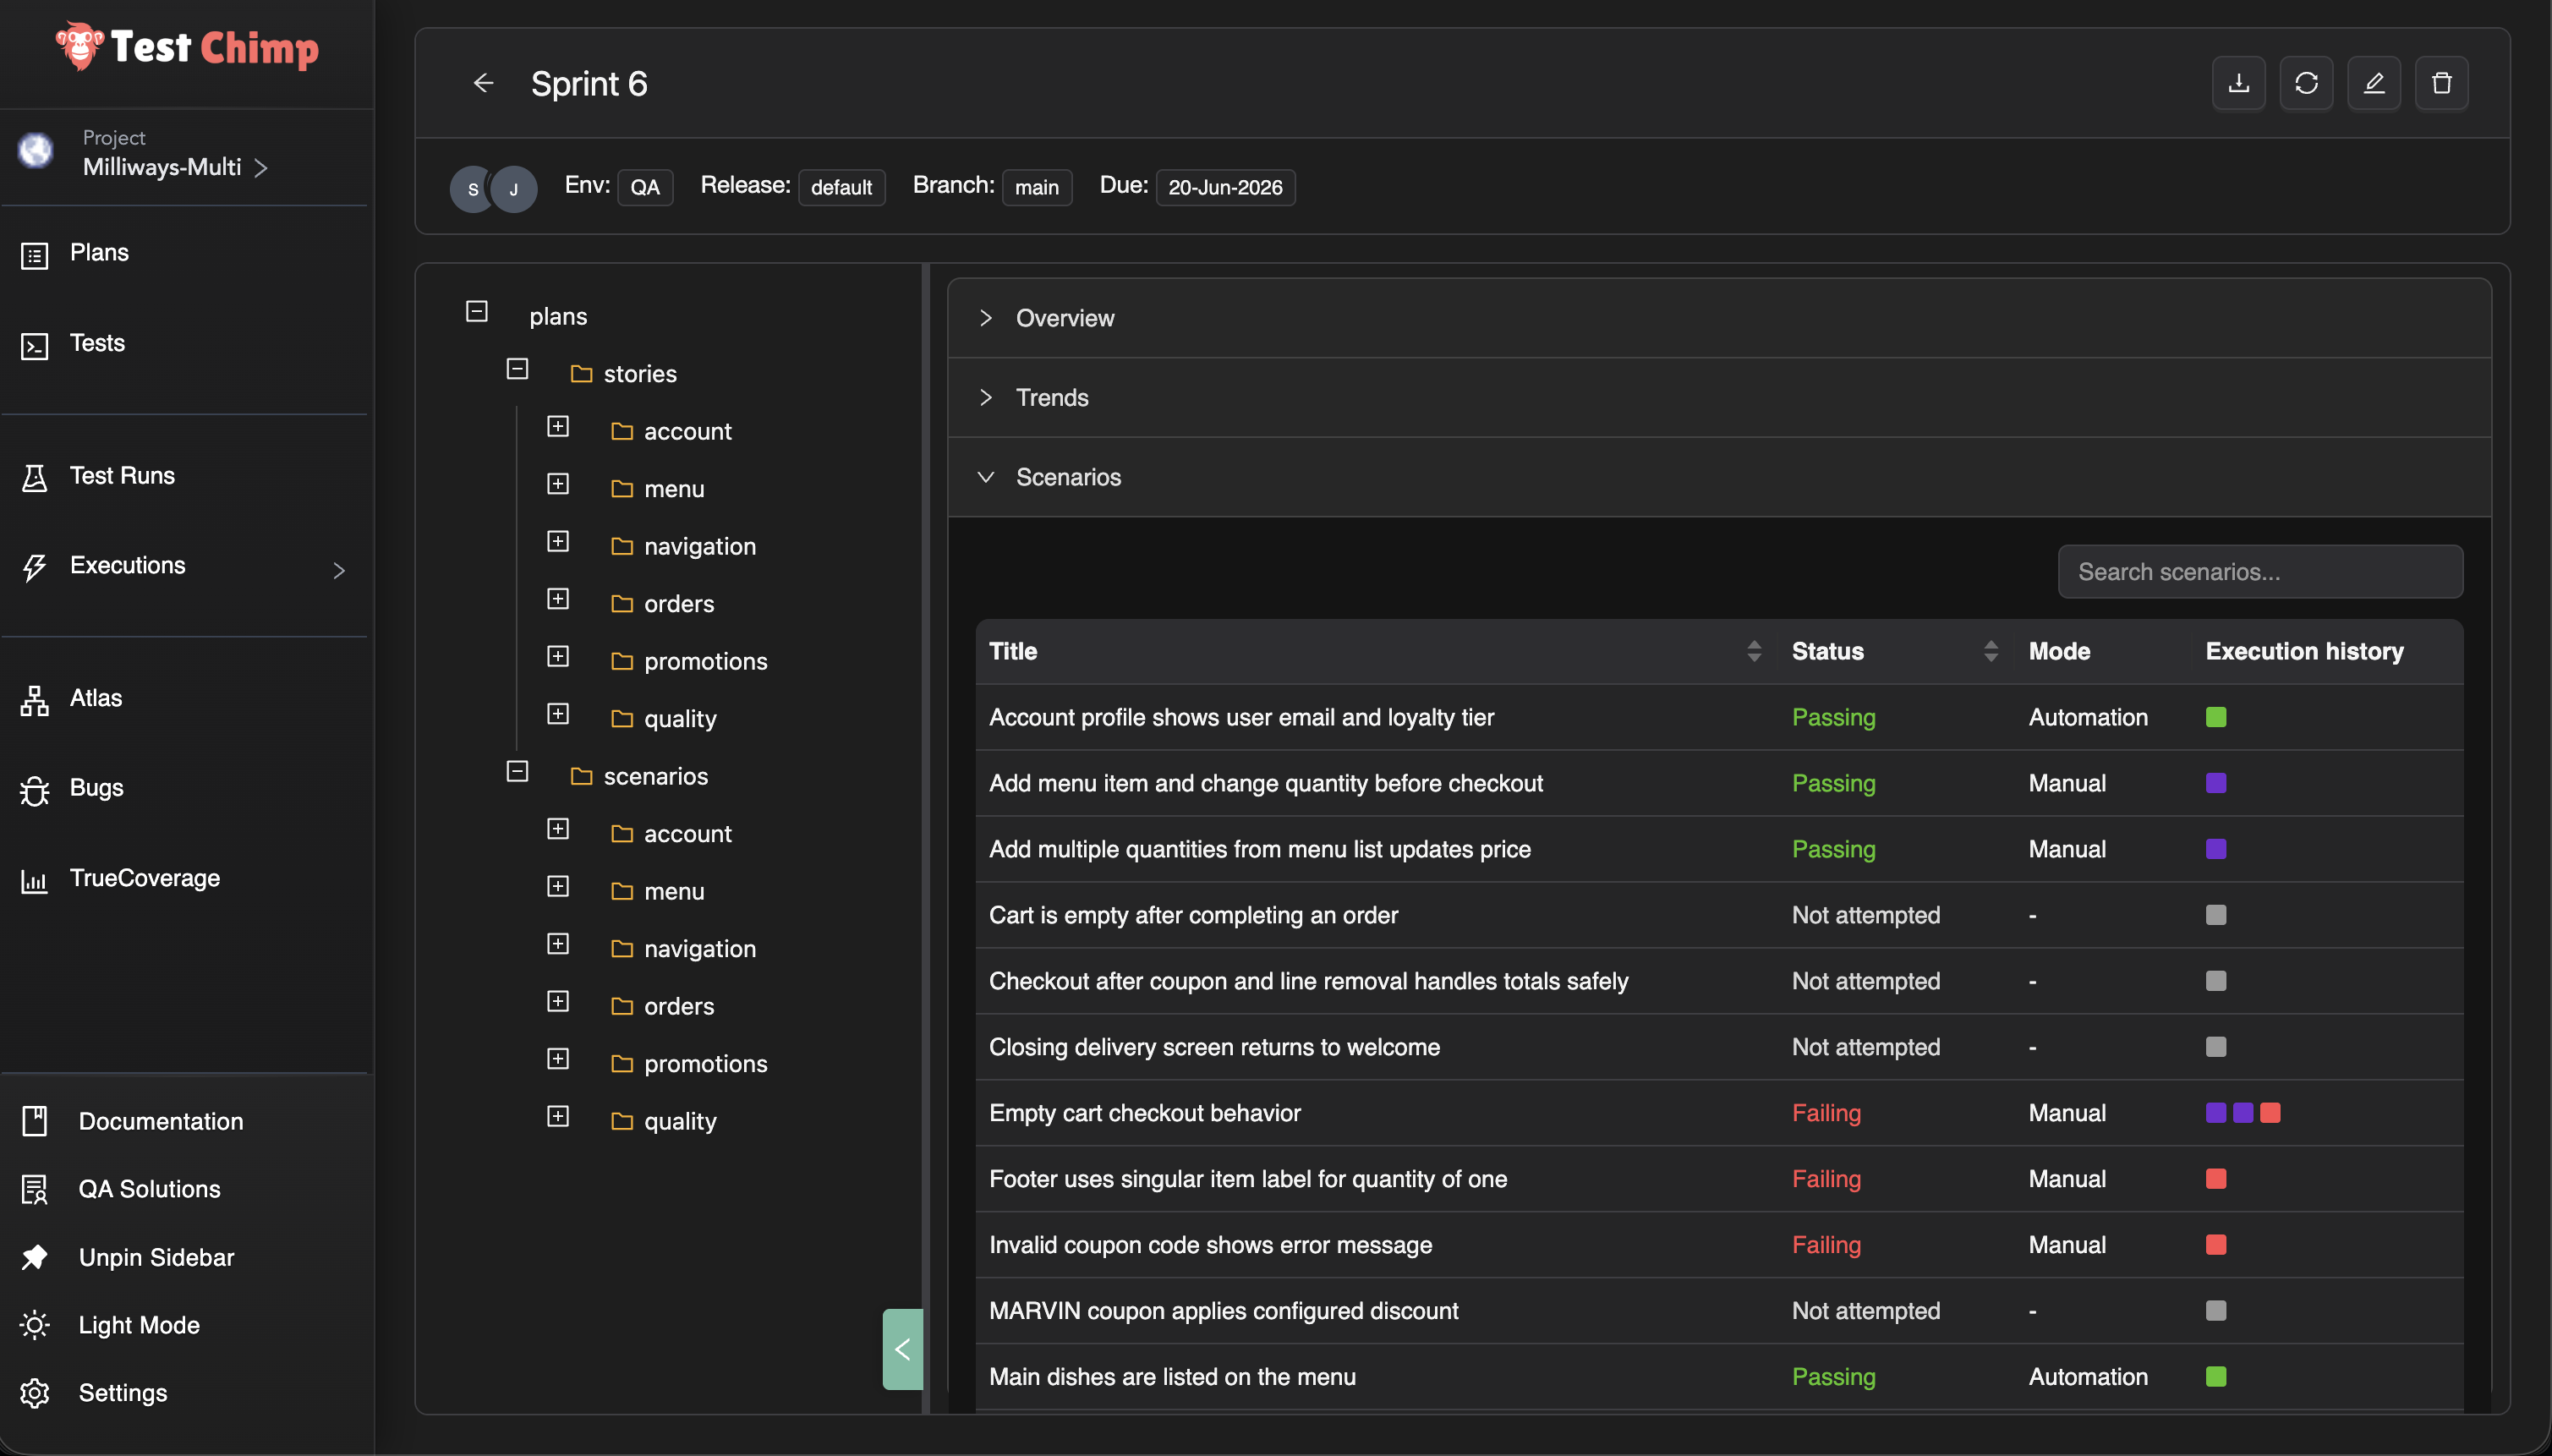
What you see in the UI
The demo above shows the full workflow:
- Left panel — folder tree mirroring your repo layout; click a folder or file to scope the view
- Graph mode — force-directed layout; proximate nodes are semantically alike
- Clusters mode — tests bucketed with named themes
- Popover — click any test to see top similar neighbours, similarity scores, and potential duplicate badges
The UI ships inside the npm package—no separate install. It is the same "freebie" static app published as @testchimp/semantic-graph-viz in the monorepo for anyone who wants to embed or fork it.
Try it yourself
Prerequisites
- Node.js 18+
- An API key for embeddings (and cluster naming):
Quick start (OpenAI)
export PROVIDER=openai
export API_KEY=sk-...

npx @testchimp/semantic-graph visualize --tests-dir ./tests
Open the printed URL (default port 3859). Add --verbose for embedding progress and diagnostics.
Claude + Voyage
export PROVIDER=anthropic
export API_KEY=sk-ant-...
export VOYAGE_API_KEY=pa-...

npx @testchimp/semantic-graph visualize --tests-dir ./tests
All options
| Flag | Description |
|---|---|
--tests-dir <path> | Root folder to scan (required) |
--port <n> | Listen port (default 3859) |
--verbose / -v | Diagnostics to stderr |
See the README for environment variables, monorepo build instructions, and npm publish details.
Continuous governance with TestChimp
Semantic Graph is deliberately local and standalone—a flashlight you can shine on any Playwright repo, TestChimp customer or not.
For continuous duplicate detection, requirement traceability, release confidence, and keeping suites healthy as agents keep authoring, see TestChimp—the git-native QA governance platform built for agentic teams. Install the TestChimp Agent Skill and run /testchimp test after each PR to orchestrate coverage, exploration, and plan alignment in one loop.
FAQ
What test file types are supported?
The scanner picks up *.spec.ts, *.spec.js, *.test.ts, *.test.js, and .mjs / .cjs variants under your chosen root—standard Playwright test layouts.
Does it require a TestChimp account?
No. Semantic Graph runs entirely locally. You only need embedding (and optionally LLM) API keys.
How is this different from code coverage?
Code coverage measures which lines executed. Semantic Graph measures whether test intentions overlap. A suite can have high line coverage and still be full of redundant scenarios.
How is this different from duplicate detection by test name?
Titles lie. Agents especially love paraphrasing: "should reject invalid coupon" vs "guest user sees error for expired promo code." Embeddings capture the full body and intent, not the string on line one.
Can I use it in CI?
Today the primary interface is the local visualize command and JSON APIs (/api/graph, /api/similar). For CI gates, parse the API responses or run before review and archive the graph output. Continuous server-side governance is on the TestChimp platform roadmap.
What embedding models are supported?
Defaults: text-embedding-3-small (OpenAI) and voyage-4 (Voyage). Override with EMBEDDING_MODEL. LLM cluster naming defaults to gpt-5-nano or claude-3-5-haiku-latest.
Is the source code open?
Yes. MIT-licensed monorepo: github.com/TestChimp/semantic-graph. Packages: @testchimp/semantic-graph-core, @testchimp/semantic-graph, @testchimp/semantic-graph-viz.
Summary
Agentic QA solved test authoring at scale. The next discipline is test distinctness at scale—ensuring every new spec adds behavioural breadth, not noise.
Semantic Graph gives you a semantic map of your Playwright suite: embeddings for meaning, DBSCAN for clusters, UMAP for intuition, and a local UI for humans and agents alike. Run it before you merge agent-authored tests. Run it when CI gets slow. Run it when you suspect the lake is boiling but not reducing risk.
Get started: github.com/TestChimp/semantic-graph · npx @testchimp/semantic-graph visualize
References and further reading
- TestChimp Semantic Graph repository — source, README, and issue tracker
@testchimp/semantic-graphon npm — CLI package- Playwright Test documentation — supported project layouts
- OpenAI Embeddings guide —
text-embedding-3-smalland related models - Voyage AI documentation — embeddings when using Claude as the LLM provider
- UMAP: Uniform Manifold Approximation and Projection — dimensionality reduction for the 2D layout
- DBSCAN clustering — density-based cluster assignment
- Fixtures in agentic test automation — complementary TestChimp blog on Arrange-layer quality
- TrueCoverage for agentic QA — production-informed test prioritization
- TestChimp Agent Skills — orchestrate QA workflows in Claude and Cursor