Multi-Environment Test Execution
In brief: Define environments and releases in TestChimp, then target them when running SmartTests, explorations, and viewing QA intelligence so metrics match the deployment you tested.
You can run the same SmartTests against different environments (e.g. QA, staging, production) by defining environment-specific variables and choosing which environment to use when you run a test.
Default environment: QA
TestChimp creates a default environment named "QA" for every project. This gives you a ready-to-use environment without any setup. You’ll see a file .env-QA under the tests folder in the SmartTests explorer. You can edit it to set variables for the QA environment (for example BASE_URL, credentials, or feature flags).
Creating additional environments
You can add more environments (e.g. staging, production, dev) so the same tests can run against different backends or configs.
- In the SmartTests explorer, right-click the tests folder.
- Choose Create new environment from the context menu.
- Enter a name for the new environment (e.g.
stagingorproduction). TestChimp creates a new file.env-<name>(e.g..env-staging) under the tests folder.
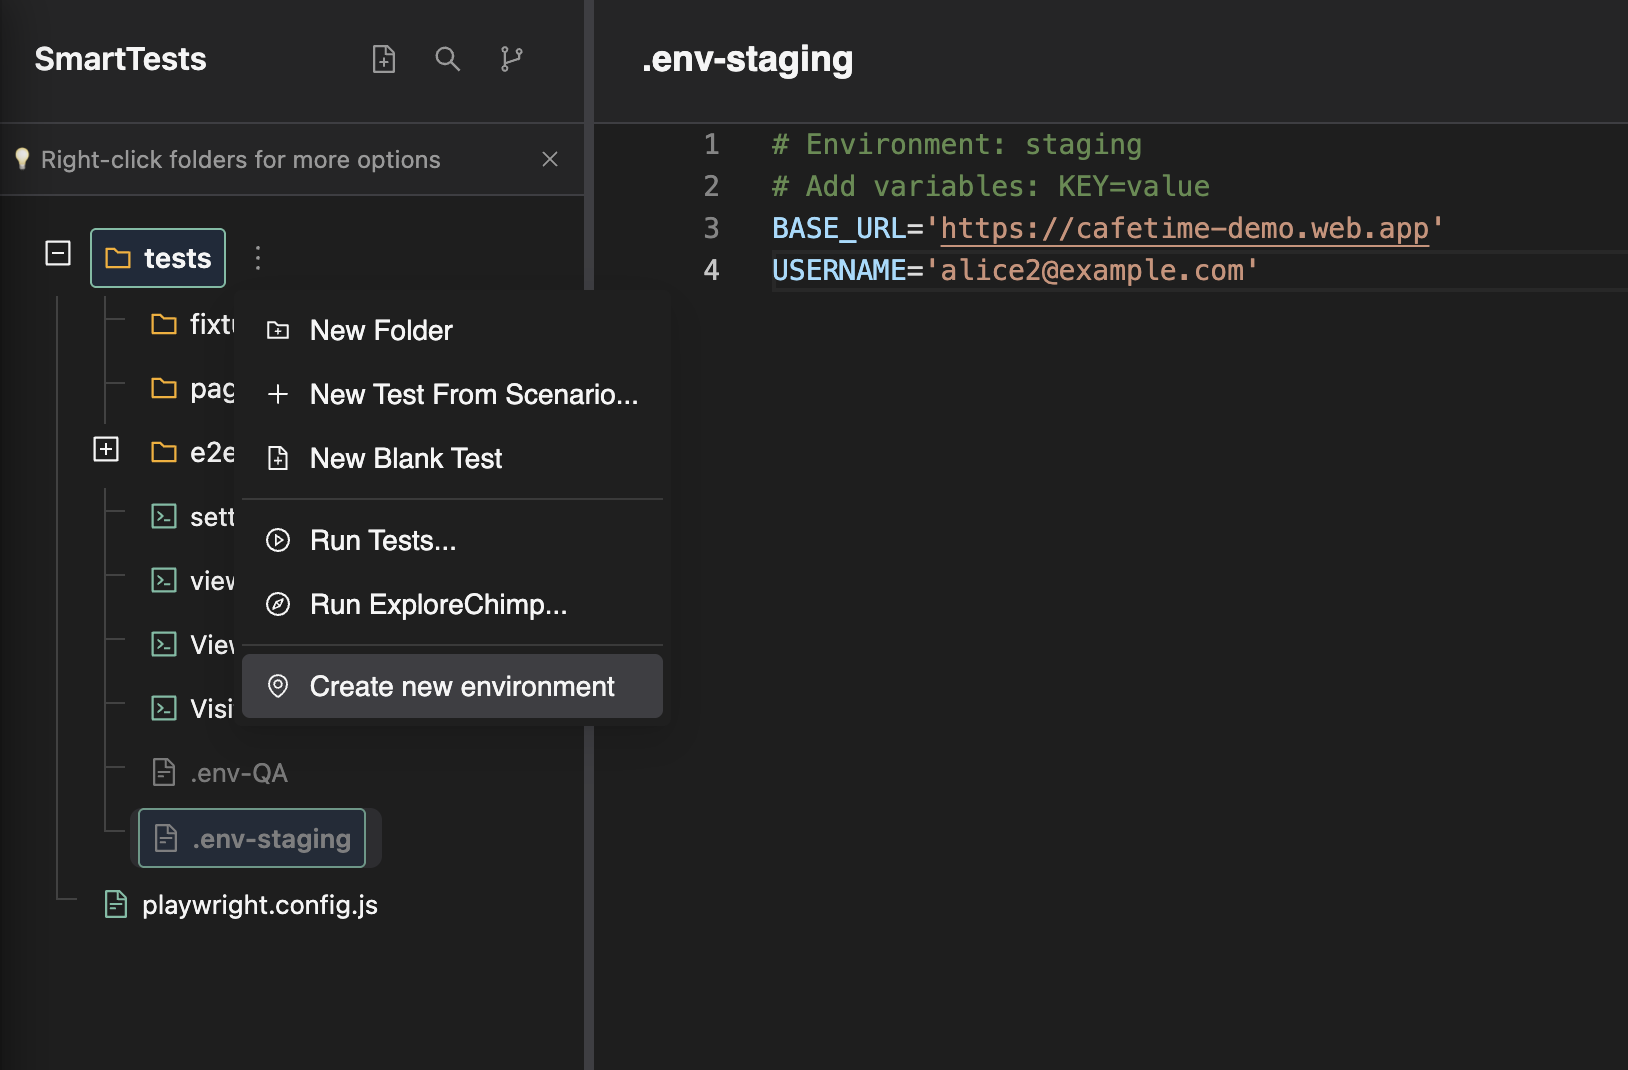
Each environment has its own file: .env-QA, .env-staging, .env-production, etc. You can create as many as you need.
Specifying environment variables
Environment files use the same format as standard .env files:
- One variable per line in the form
KEY=value. - Comments start with
#. - Values can be quoted if they contain spaces or special characters.
Example .env-staging:
# Environment: staging
# Add variables: KEY=value
BASE_URL='https://staging.example.com'
USERNAME='alice@example.com'
API_KEY='your-api-key'
Common variables include:
- BASE_URL – Application URL for that environment (often used with Playwright’s
baseURL). - USERNAME / PASSWORD – Test account credentials.
- API_KEY, API_SECRET – Keys for services used in tests.
- Any other config your tests need (feature flags, timeouts, etc.).
The runner loads the variables from the chosen environment file when you run a test, so each run uses only that environment’s values.
Referring to environment variables in tests
In your SmartTests (Playwright code), use process.env.VARIABLE_NAME to read variables that were loaded from the selected environment file.
Example:
import { test } from '@playwright/test';

test('login and view dashboard', async ({ page }) => {
  const baseURL = process.env.BASE_URL;
  await page.goto(baseURL);

  await page.fill('#username', process.env.USERNAME || '');
  await page.fill('#password', process.env.PASSWORD || '');
  await page.click('button[type="submit"]');

  await expect(page).toHaveURL(/dashboard/);
});
Selecting the environment when running a test
When you run a test from the TestChimp Web IDE, you choose which environment to use for that run.
- Right-click a test (or test folder) and select Run Tests... (or use the Run action in the editor).
- In the Run Test dialog, use the Environment dropdown to select an environment (e.g. QA, staging, production).
- Optionally choose a Release.
- Click Run.
The test run will load variables only from the selected environment’s file (e.g. .env-staging when you choose "staging"). This lets you run the same test against QA, staging, or production without changing the test code—only the environment selection and the contents of each .env-<name> file.
Summary
| Concept | Description |
|---|---|
| Default environment | "QA" is created by default; edit .env-QA to set QA variables. |
| More environments | Right-click tests → Create new environment; each gets a .env-<name> file. |
| Defining variables | In each .env-<name> file use KEY=value (and optional # comments). |
| Using in tests | Read them in Playwright with process.env.VARIABLE_NAME. |
| Choosing at run time | In the Run Test dialog, pick the Environment from the dropdown before clicking Run. |
For running SmartTests in CI with a specific environment, use the same env files (or CI secrets) and the environment selection or TESTCHIMP_ENV as described in Run SmartTests in CI with Playwright Runner.
FAQ
How do environments affect insights?
Execution scope filters dashboard, TrueCoverage, and traceability views to environment + release + time range.
Can agents provision PR environments?
/testchimp init can wire PR-scoped full-stack isolation when your stack supports preview URLs or Bunnyshell-style envs.
Default QA environment?
TestChimp creates a default QA environment and release; add staging/production mirrors as your process matures.