Creating SmartTests
In brief: Create SmartTests in your mapped tests/ folder using Playwright patterns plus TestChimp fixtures, scenario comments, and screen-state markers agents and ExploreChimp rely on.
We recommend authoring SmartTests with your coding agent—upskilled with the TestChimp skill—in a continuous feedback loop that surfaces coverage gaps and closes them over time.
The TestChimp Web IDE is primarily for viewing tests, running them, and reviewing insights aligned with your test folder structure—not for day-to-day authoring.
There are two recommended paths to create SmartTests:
- Agent-authored tests — the default:
/testchimp init,/testchimp test,/testchimp evolve, and related workflows driven by plans, coverage signals, and your repo harness. - From manual session capture — record a traced manual run with scenario linking, then Copy test generate prompt for your agent to author automation informed by session details.
Before the workflows below, it helps to understand how files are laid out in the Web IDE and in Git.
tests folder structure
The canonical description of the tests directory—including subfolders, environment files, and how specs are discovered—lives in tests_README.md at the root of your mapped tests tree. New projects receive this file from TestChimp; the same template is maintained in the product codebase at services/featureservice/src/main/resources/templates/tests_README.md.
Summary (see tests_README.md for full detail):
tests/
  pages/
  e2e/
  search/          # example; any subfolder may hold specs
  setup/
  assets/
  .env-QA          # per-environment config (e.g. .env-staging); pattern .env-<name>
  playwright.config.js
- pages/ — Page Object Models (reusable page helpers).
- setup/ — Global setup (e.g.
global.setup.spec.js), run via Playwright project dependencies; not part of the main chromium project. - e2e/ and other folders under
tests/— End-to-end specs matching*.{spec,test}.{js,ts}(layout is flexible;e2e/is a common convention). - assets/ — Files used by tests (e.g. uploads).
- Environment files (e.g.
.env-QA,.env-staging) — Environment-specific variables (process.env.VAR_NAME). A default QA environment is created automatically; more can be added from thetestsfolder context menu. - playwright.config.js — Standard Playwright configuration. TestChimp installs
@testchimp/playwrightfor you.
TestChimp Web IDE — view, run, and inspect
The SmartTests Web IDE is where you open and review tests, run them, browse the test tree, and see QA insights rolled up along the same folder structure as your tests/ tree. When GitHub sync is enabled, it keeps the mapped tests folder aligned with your repo.
The editor supports Code view (full Playwright source) and Simplified view (structured step display). Use these modes to inspect and lightly edit agent-authored tests—not as the primary authoring surface.
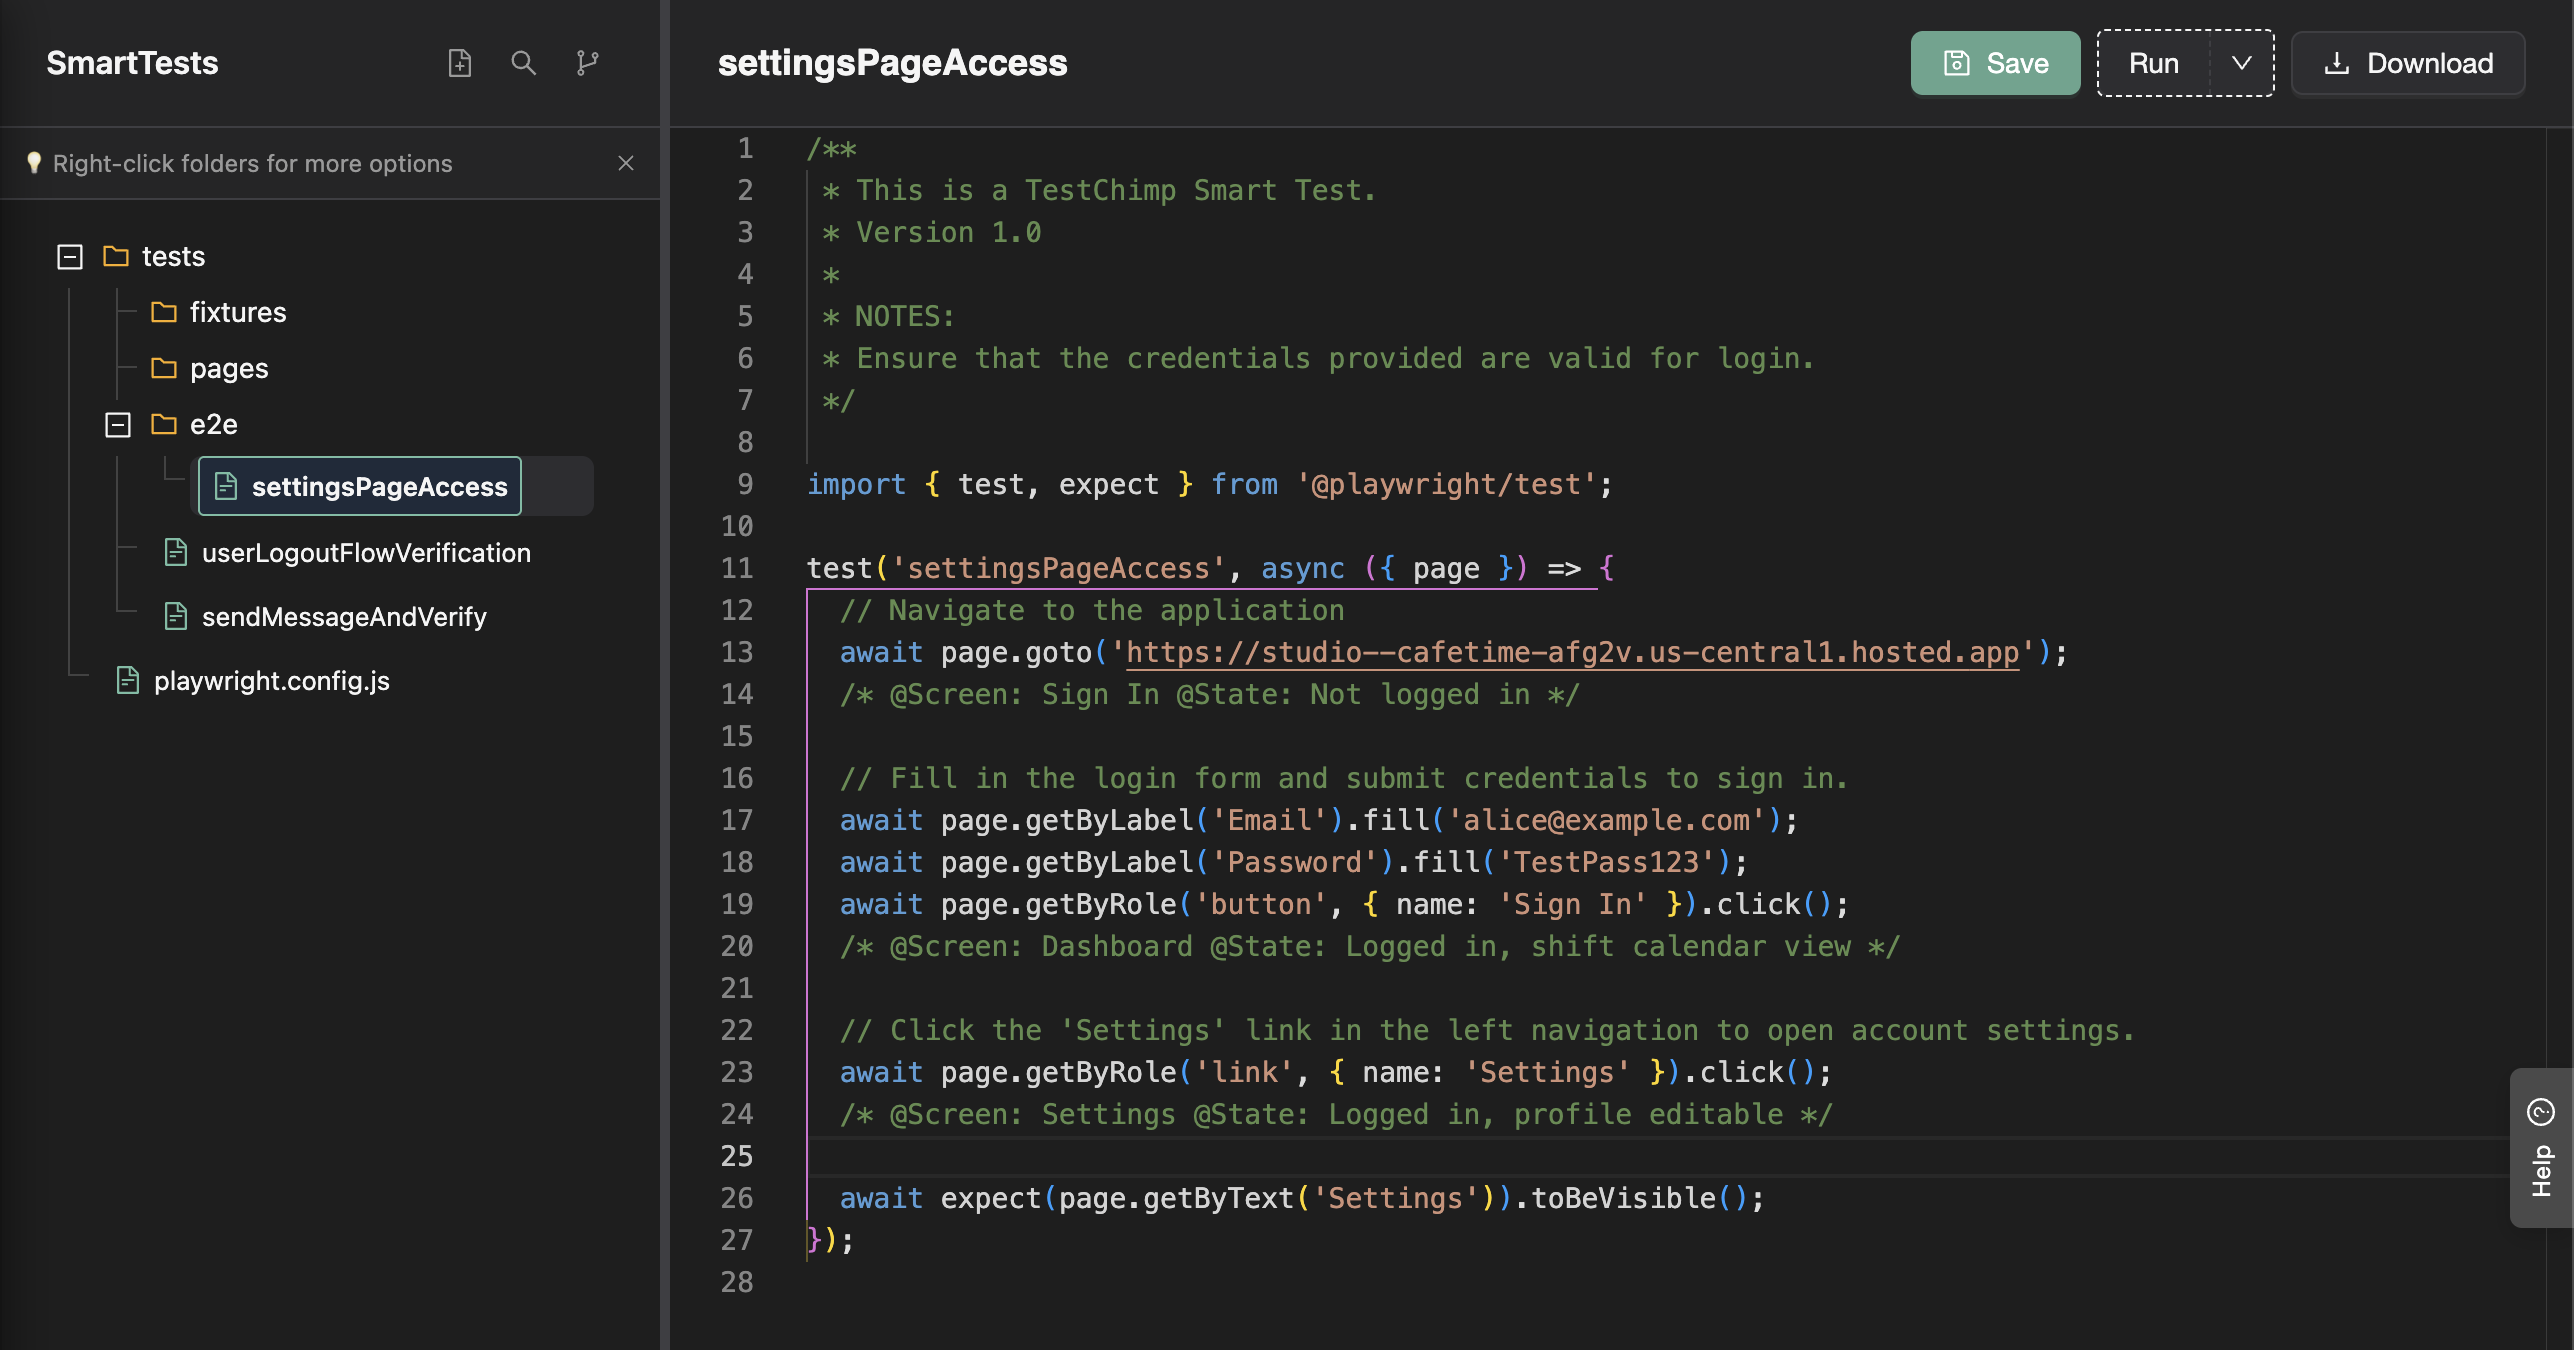
Web SmartTests are Playwright scripts with TestChimp-specific additions. Native mobile projects use Mobilewright scaffolds instead—see Mobile testing. What TestChimp adds on top of Playwright (plain-English AI steps, scenario linking, ExploreChimp, TrueCoverage) is documented under “What TestChimp Adds to Playwright” in tests_README.md.
1. Agent-authored SmartTests (recommended)
Install the TestChimp skill on Claude Code, Cursor, or any host that loads skills, then use the orchestrated commands:
| Command | Purpose |
|---|---|
/testchimp init | Bootstrap QA harness once per repo (fixtures, CI, seed/probe patterns). |
/testchimp test | PR-scoped authoring and execution—implement or extend tests for changed scope. |
/testchimp evolve | Portfolio loop: close coverage gaps from requirement + TrueCoverage signals, maintain fixtures and suite hygiene. |
/testchimp explore | Optional ExploreChimp analytics along existing SmartTest journeys. |
The agent reads markdown test plans in repo, MCP/CLI intelligence (coverage, manual sessions, screen states), and your existing POMs, fixtures, and seed/probe endpoints. It authors Playwright that fits your conventions—not isolated one-off scripts.
Continuous feedback loop
- Requirement coverage — gaps from unlinked or under-tested scenarios (test planning insights).
- TrueCoverage — gaps from real user behaviour vs what automation exercises (TrueCoverage).
- Execution telemetry — flakes and failures to fix in the same agent loop.
Full workflow: QA on Autopilot.
You can also paste a test generate prompt from Test Planning (Create Test → Copy test generate prompt) when you have a written scenario and want the agent to author from plan context without a manual recording first.
2. From manual session capture (Chrome extension)
Turn a manual test session into automation: capture with the extension, then use Copy test generate prompt for your agent. This replaces the older Recorded steps → Script Gen Web IDE tab—the flow is now capture → prompt → agent, not in-IDE script generation.
The capture itself also creates an auditable manual execution (pass/fail, screenshots, notes, optional bugs) linked to your scenario for coverage and test runs.
Capture the session
- Install the Chrome extension and sign in.
- Start from Test Planning (recommended for scenario traceability):
- Open a scenario → Create Test → Record manual test steps
- Go to your webapp and open the extension — the project and scenario are pre-selected (handoff is valid for about three minutes)
- In the extension, click Create Manual Test Record (scenario pre-filled when you started from Test Planning), set environment and release, then Start Capture.
- Perform the journey in your app. Steps and screenshots are captured as you go; add notes or bugs on steps when useful.
- Click End capture and mark the session passed or failed.
Full capture options (open-ended sessions, test-run linking, step annotations): Manual test session capture.
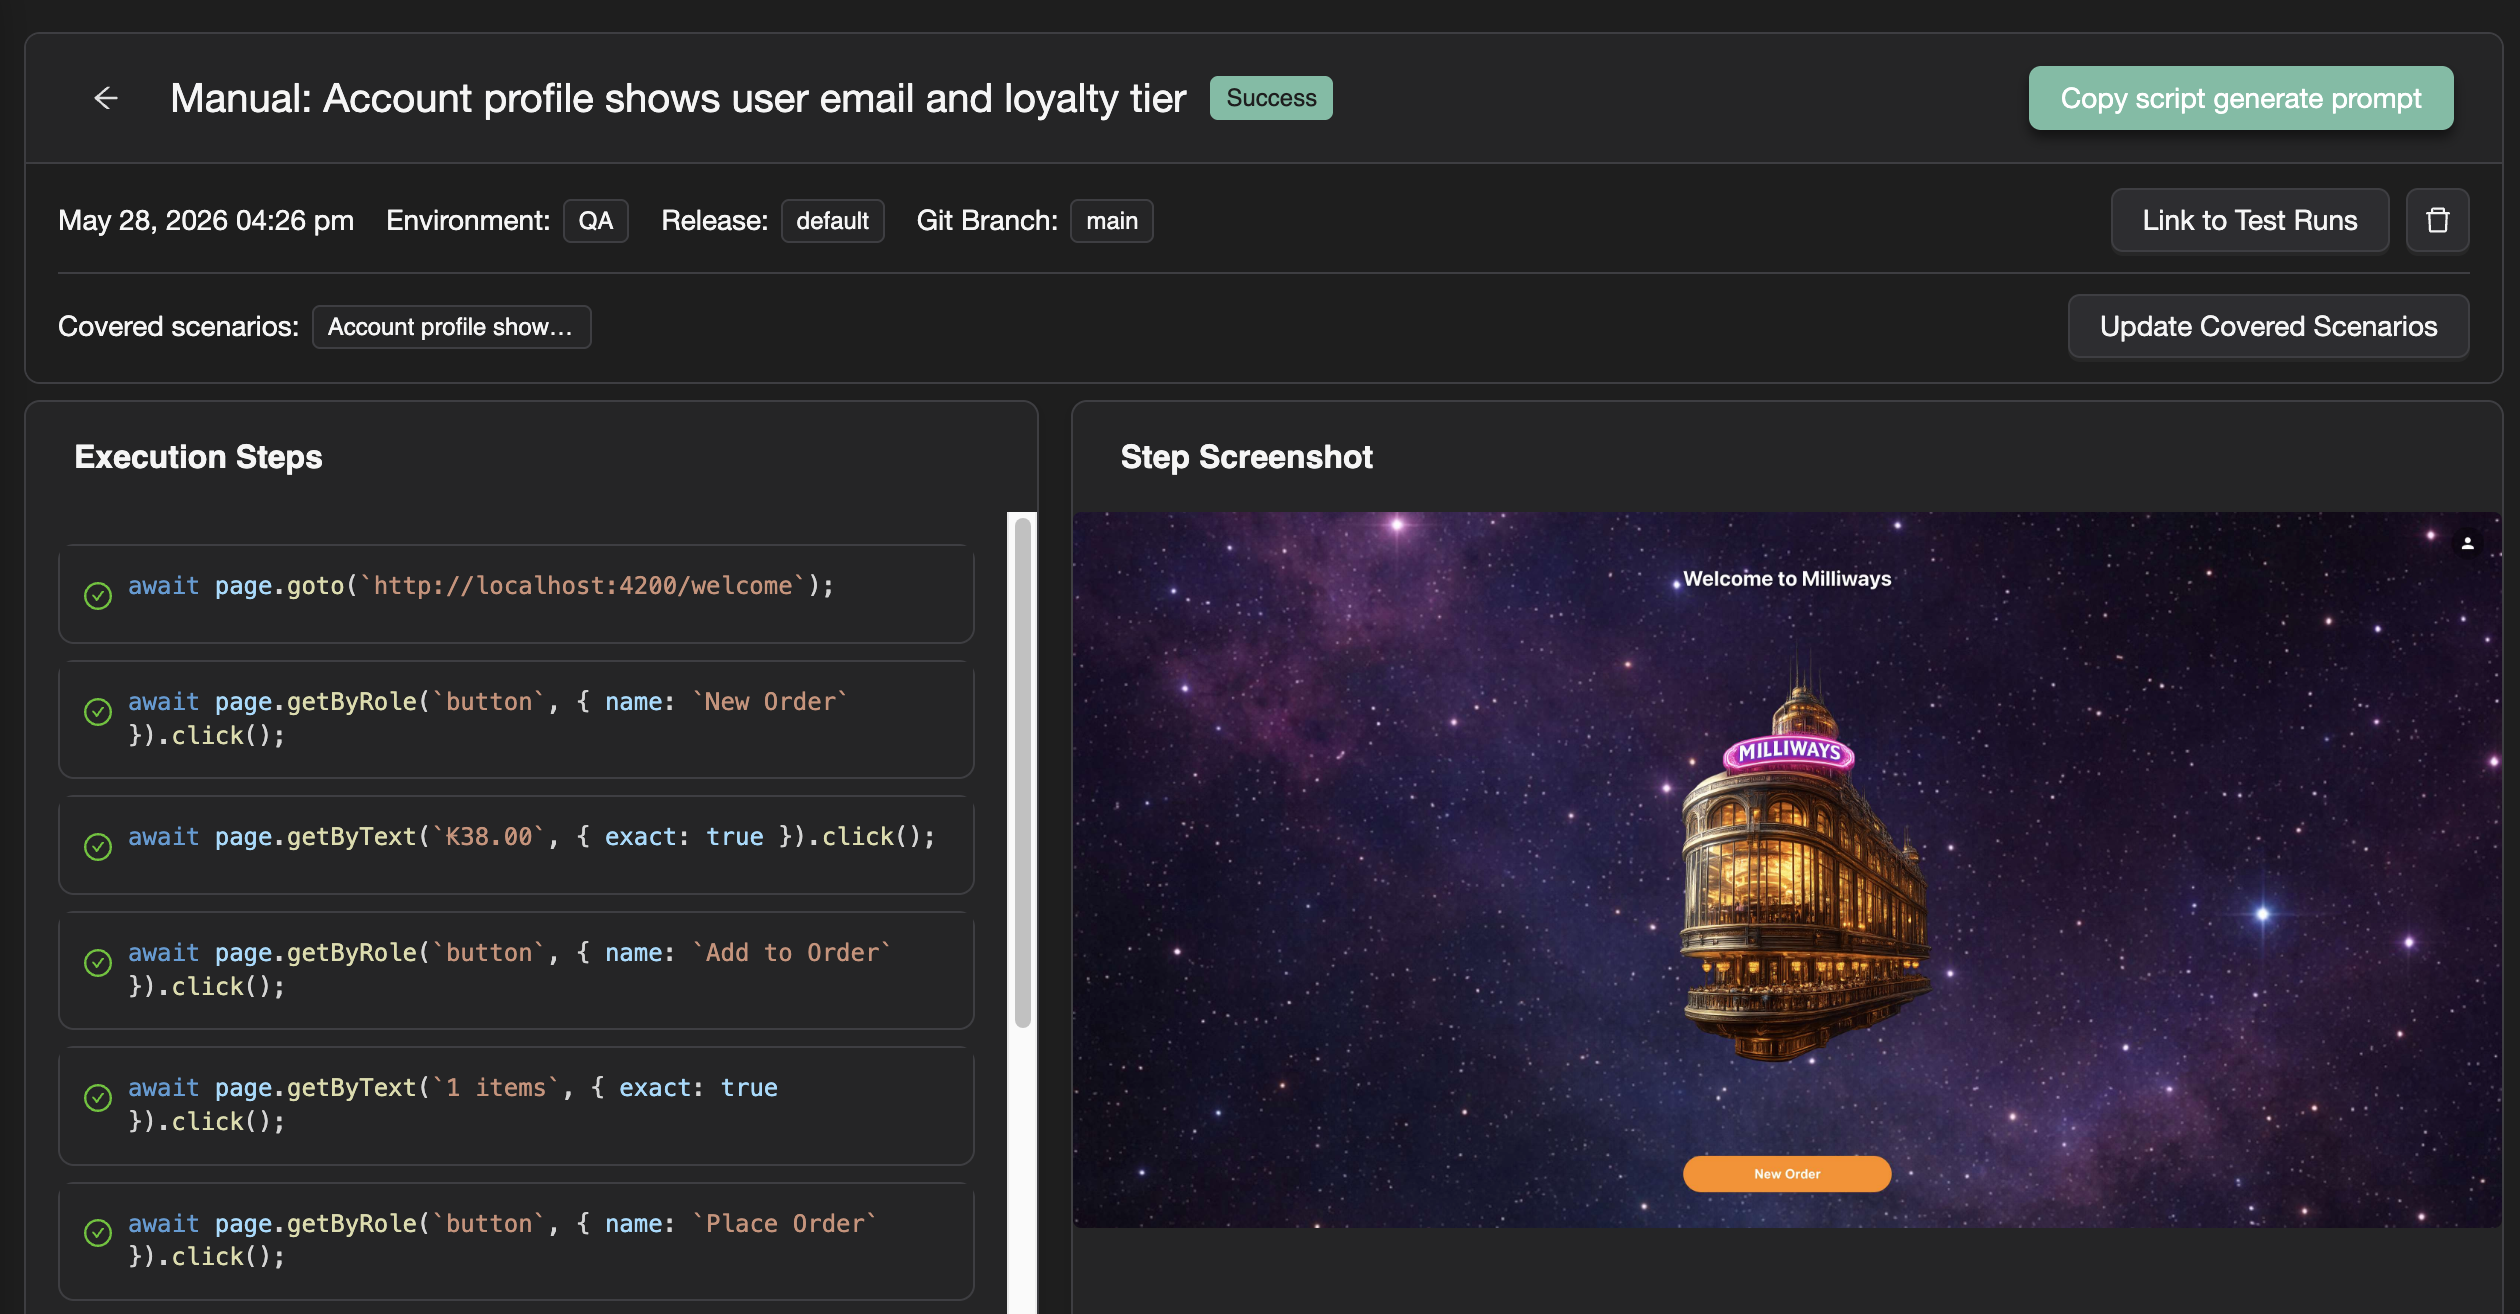
Author the SmartTest from the session
- Open the session in TestChimp — Executions → Manual Sessions → View, or View execution from the extension.
- Click Copy test generate prompt and paste it into your TestChimp upskilled agent (e.g. Cursor or Claude with the TestChimp skill).
- The agent fetches manual session details and linked scenarios (
get-manual-session-detailsvia CLI or MCP). Context includes:- Recorded steps (actions the tester performed)
- Linked scenarios (business intent, scenario steps, traceability targets)
- Screenshots per step (visual reference while navigating the app)
- Your repo’s POMs, fixtures, seed/probe endpoints, and folder layout
- The agent uses that context to author a Playwright SmartTest that reuses existing harness patterns and adds seed/probe/fixture coverage where gaps exist—producing repeatable automation, not blind record-replay (why record-replay falls short).
- Review the generated script in the Web IDE (Code or Simplified view), run it, and iterate via your agent as needed.
Screen states and ExploreChimp
UI SmartTests that participate in ExploreChimp (optional with /testchimp test, /testchimp evolve, or as the main task with /testchimp explore) should record stable screen–state checkpoints with the markScreenState Playwright fixture registered via installTestChimp in tests/fixtures/index.js—not legacy // @screen / // @state comments on new work.
- Fixture usage —
test('…', async ({ page, markScreenState }) => { … await markScreenState('Screen', 'State'); }). - Atlas — Keep names aligned with
list-screen-states/upsert-screen-statesso Atlas and bug triage stay consistent.
Full detail, examples, and legacy comment format: Screen-State Annotations. Command overview: /testchimp explore.
Playwright best practices
When creating SmartTests, you can use Playwright patterns such as page objects, hooks, suites, and config:
Page Object Models (POMs)
Organize page interactions using Page Object Models:
class LoginPage {
  constructor(private page: Page) {}

  async goto() {
    await this.page.goto('https://example.com/login');
  }

  async fillUsername(username: string) {
    await this.page.fill('#username', username);
  }

  async clickLogin() {
    await this.page.click('button[type="submit"]');
  }
}
Assets
Use files under tests/assets/ for uploads and similar needs. See tests_README.md for how assets/ fits into the layout.
await page.setInputFiles('input[type="file"]', 'path/to/file.pdf');
Config files
Configure tests with playwright.config.js or playwright.config.ts:
import { defineConfig } from '@playwright/test';

export default defineConfig({
  testDir: './tests',
  use: {
    baseURL: 'https://example.com',
    screenshot: 'only-on-failure',
  },
});
Hooks
Use hooks for setup and teardown:
test.beforeEach(async ({ page }) => {
  await page.goto('https://example.com');
});

test.afterEach(async ({ page }) => {
  await page.close();
});
These patterns work well with TestChimp agents, scenario linking, and exploration features described in tests_README.md.
FAQ
Where should new SmartTests live?
Under your Git-mapped SmartTests root—often tests/—mirroring feature folders that match plans/ structure for insights rollups.
Can Claude create SmartTests for me?
Yes—/testchimp test scopes the agent to author or update specs, link scenarios, and open PR-ready Playwright changes.
What fixtures should I install?
Use installTestChimp in tests/fixtures/index.js for markScreenState, ai helpers, and reporter-compatible test identity.