Authoring Test Scenarios
In brief: Test scenarios capture executable intent as markdown files; SmartTests reference them with // @Scenario comments so TestChimp reports functional coverage without spreadsheets.
Overview
Test scenarios in TestChimp define the specific test cases that validate your user stories. Like user stories, scenarios are markdown files with structured frontmatter, organized in folders for context and easy navigation.
Creating Test Scenarios
There are two main ways to create test scenarios in TestChimp:
Method 1: From a User Story (Recommended)
The most common workflow is to create scenarios directly from a user story:
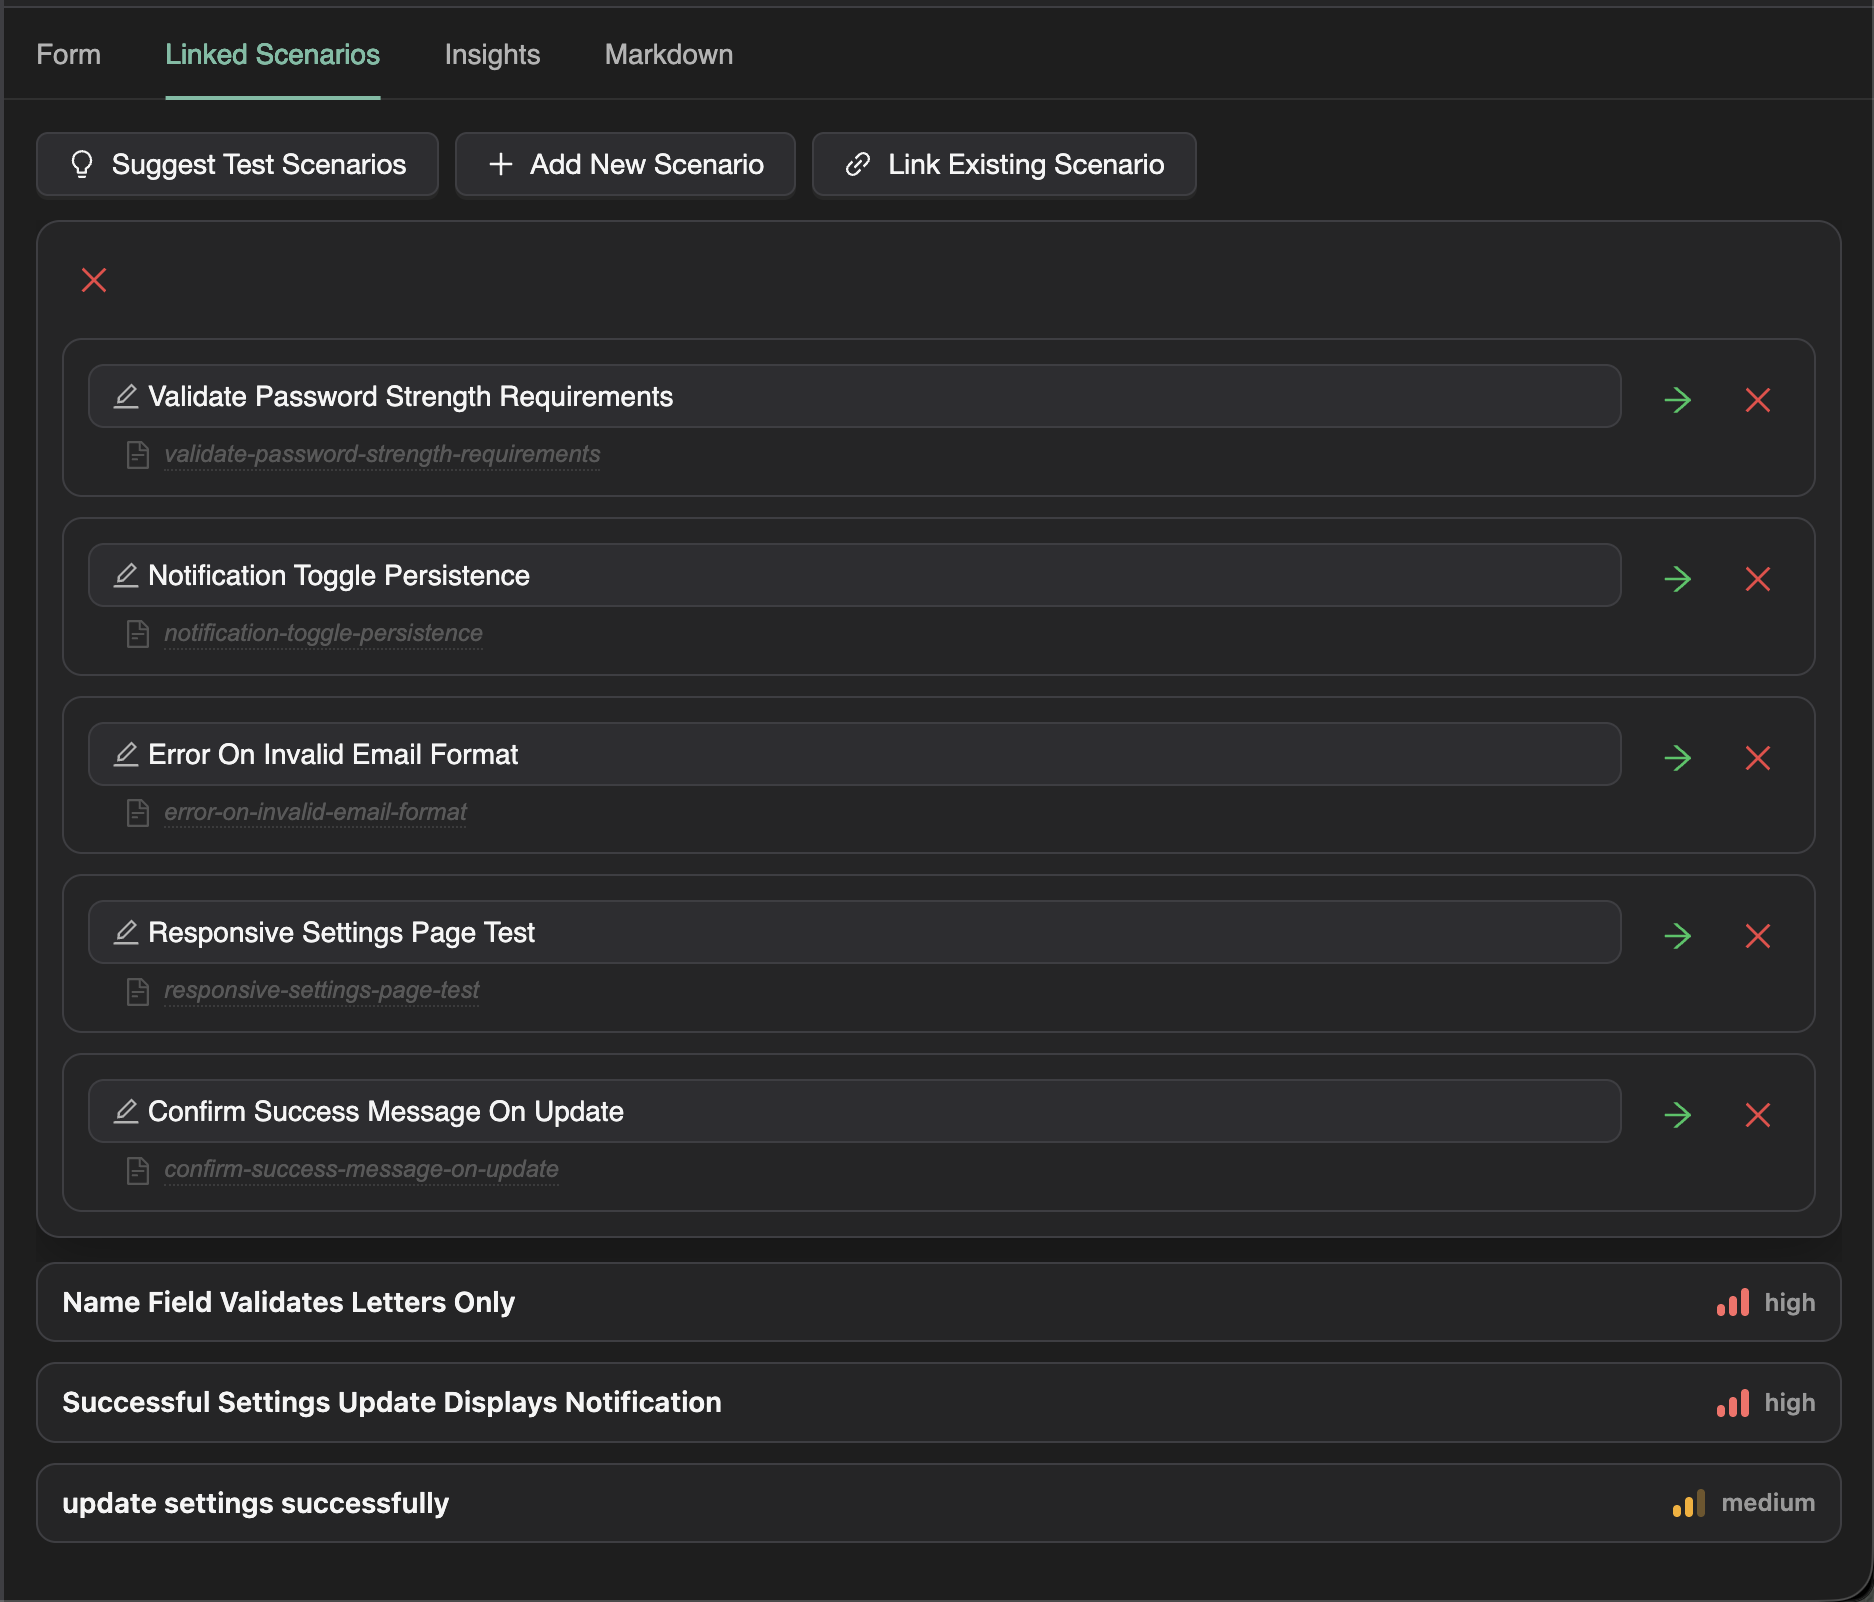
- Open a user story in the Test Planning editor
- Navigate to the Linked Scenarios tab
- Click "Suggest Scenarios"
- Review the AI-suggested scenarios
- Select scenarios to add, or modify them before adding
This approach ensures scenarios are:
- Automatically linked to the parent story
- Informed by the story's context and acceptance criteria
- Organized in a related folder structure
Method 2: Direct Creation
You can also create scenarios directly in the scenarios folder:
- In the Test Planning explorer, navigate to the scenarios folder
- Right-click on a folder (or the scenarios root)
- Select New Scenario
- Enter a title and fill out the scenario details
- Optionally link to a user story via the form
The "Suggest Scenarios" Feature
How It Works
When you click "Suggest Scenarios" from a user story:
- TestChimp analyzes the user story content
- It considers the acceptance criteria
- It reviews related scenarios in the same folder
- It generates a comprehensive set of test scenarios covering:
- Happy path scenarios
- Error handling scenarios
- Edge cases
- Boundary conditions
Reviewing Suggested Scenarios
The suggestion wizard presents scenarios one by one:
- Review the title: Does it clearly describe what's being tested?
- Review the steps: Are the test steps accurate and complete?
- Modify if needed: Edit the scenario before accepting
- Accept or skip: Add scenarios you want, skip ones you don't
AI-Assisted Scoping
For each suggested scenario, you can:
- Accept as-is: Add the scenario with the suggested content
- Edit and accept: Modify the scenario before adding
- Regenerate: Ask AI to suggest a different approach
- Skip: Don't add this scenario
The AI uses your full application context to generate accurate, specific test steps.
Scenario Fields
Each test scenario includes:
| Field | Description |
|---|---|
| Title | Clear, specific description of what's being tested |
| Description | Overview of the test scenario |
| Preconditions | Required state before test execution |
| Test Steps | Ordered list of actions to perform |
| Expected Results | What should happen at each step |
| Priority | Test priority (Critical, High, Medium, Low) |
| Status | Workflow state (Draft, Ready, Approved) |
| Labels | Tags for categorization |
| Linked Story | Reference to the parent user story |
Linking Scenarios to User Stories
From the Linked Scenarios Tab
When viewing a user story:
- Go to the Linked Scenarios tab
- Click "Link Existing" to connect an existing scenario
- Search for the scenario by title
- Select to create the link
From the Scenario Form
When editing a scenario directly:
- Find the Linked User Story field
- Search for and select the parent story
- Save the scenario
Automatic Linking
Scenarios created via "Suggest Scenarios" are automatically linked to the source user story.
Folder Organization for Scenarios
Parallel Structure with Stories
Organize scenarios to mirror your stories structure:
scenarios/
├── authentication/
│   ├── login-happy-path.md
│   ├── login-invalid-email.md
│   ├── login-wrong-password.md
│   ├── login-account-locked.md
│   └── registration-validation.md
├── user-management/
│   ├── update-profile-success.md
│   └── update-profile-validation.md
└── billing/
    ├── add-payment-method.md
    └── subscription-upgrade.md
Benefits of Organization
- Feature alignment: Scenarios for authentication live with auth stories
- Scoped coverage: See coverage for just the billing module
- Team ownership: Assign scenario folders to QA team members
- Contextual AI: Related scenarios inform new scenario generation
Test Scenario Workflow
Writing Effective Test Steps
Structure your test steps clearly:
## Test Steps

1. Navigate to the login page
   - **Expected**: Login form is displayed with email and password fields

2. Enter valid email address
   - **Expected**: Email field accepts input, no validation errors

3. Enter incorrect password
   - **Expected**: Password field accepts input (masked)

4. Click "Login" button
   - **Expected**: Error message "Invalid credentials" is displayed

5. Verify user remains on login page
   - **Expected**: Login form is still visible, fields are not cleared
Preconditions
Document what must be true before the test:
## Preconditions

- User account exists with email "test@example.com"
- User account is not locked
- User is not currently logged in
- Browser cookies are cleared
Expected Results
Be specific about what success looks like:
## Expected Results

- Error message appears within 2 seconds
- Message text is "Invalid email or password"
- Login form remains visible
- Email field retains entered value
- Password field is cleared
- "Forgot Password" link is highlighted
Linking Tests to Scenarios (Traceability)
Once you have scenarios defined, link your automated tests to them for requirement traceability:
test('shows error for invalid credentials', async ({ page }) => {
  // @Scenario: Login - Invalid Credentials Error
  await page.goto('/login');
  await page.fill('[data-testid="email"]', 'test@example.com');
  await page.fill('[data-testid="password"]', 'wrongpassword');
  await page.click('[data-testid="login-button"]');
  await expect(page.locator('.error-message')).toContainText('Invalid');
});
The // @Scenario: comment links the test to your scenario, enabling coverage tracking.
Learn more about linking in Requirement Traceability.
Best Practices
Scenario Design
- One scenario, one thing: Each scenario should test a single behavior
- Clear naming: Title should describe the condition and expected outcome
- Specific steps: Steps should be detailed enough for anyone to follow
- Measurable results: Expected results should be objectively verifiable
Coverage Completeness
- Cover acceptance criteria: Each acceptance criterion should have scenarios
- Include negative cases: Test what happens when things go wrong
- Consider edge cases: Boundary values, empty states, maximum limits
- Test error recovery: What happens after an error occurs
Maintenance
- Keep scenarios updated: Update when requirements change
- Archive obsolete scenarios: Don't delete, move to archive folder
- Review regularly: Ensure scenarios still match application behavior
- Link to tests: Maintain links between scenarios and automated tests
Next Steps
With scenarios authored and linked:
- Export to Git — Sync scenarios to your repository
- Track coverage — Monitor which scenarios have passing tests
- Run in CI — Execute tests and track results
FAQ
What belongs in a scenario file?
Frontmatter metadata plus steps, preconditions, expected outcomes, and links to related stories—readable by QA and agents alike.
How do I link a SmartTest to a scenario?
Add // @Scenario: path/to/scenario.md in the test file; multiple scenarios can be referenced from one test.
Can I see coverage per folder?
Yes—Test Planning Insights and SmartTests Insights roll up linked vs unlinked scenarios at any folder granularity.