Authoring User Stories
In brief: User stories in TestChimp are markdown files with structured frontmatter—priority, status, labels, and acceptance criteria—editable in the app and synced to your plans/ folder in Git.
Overview
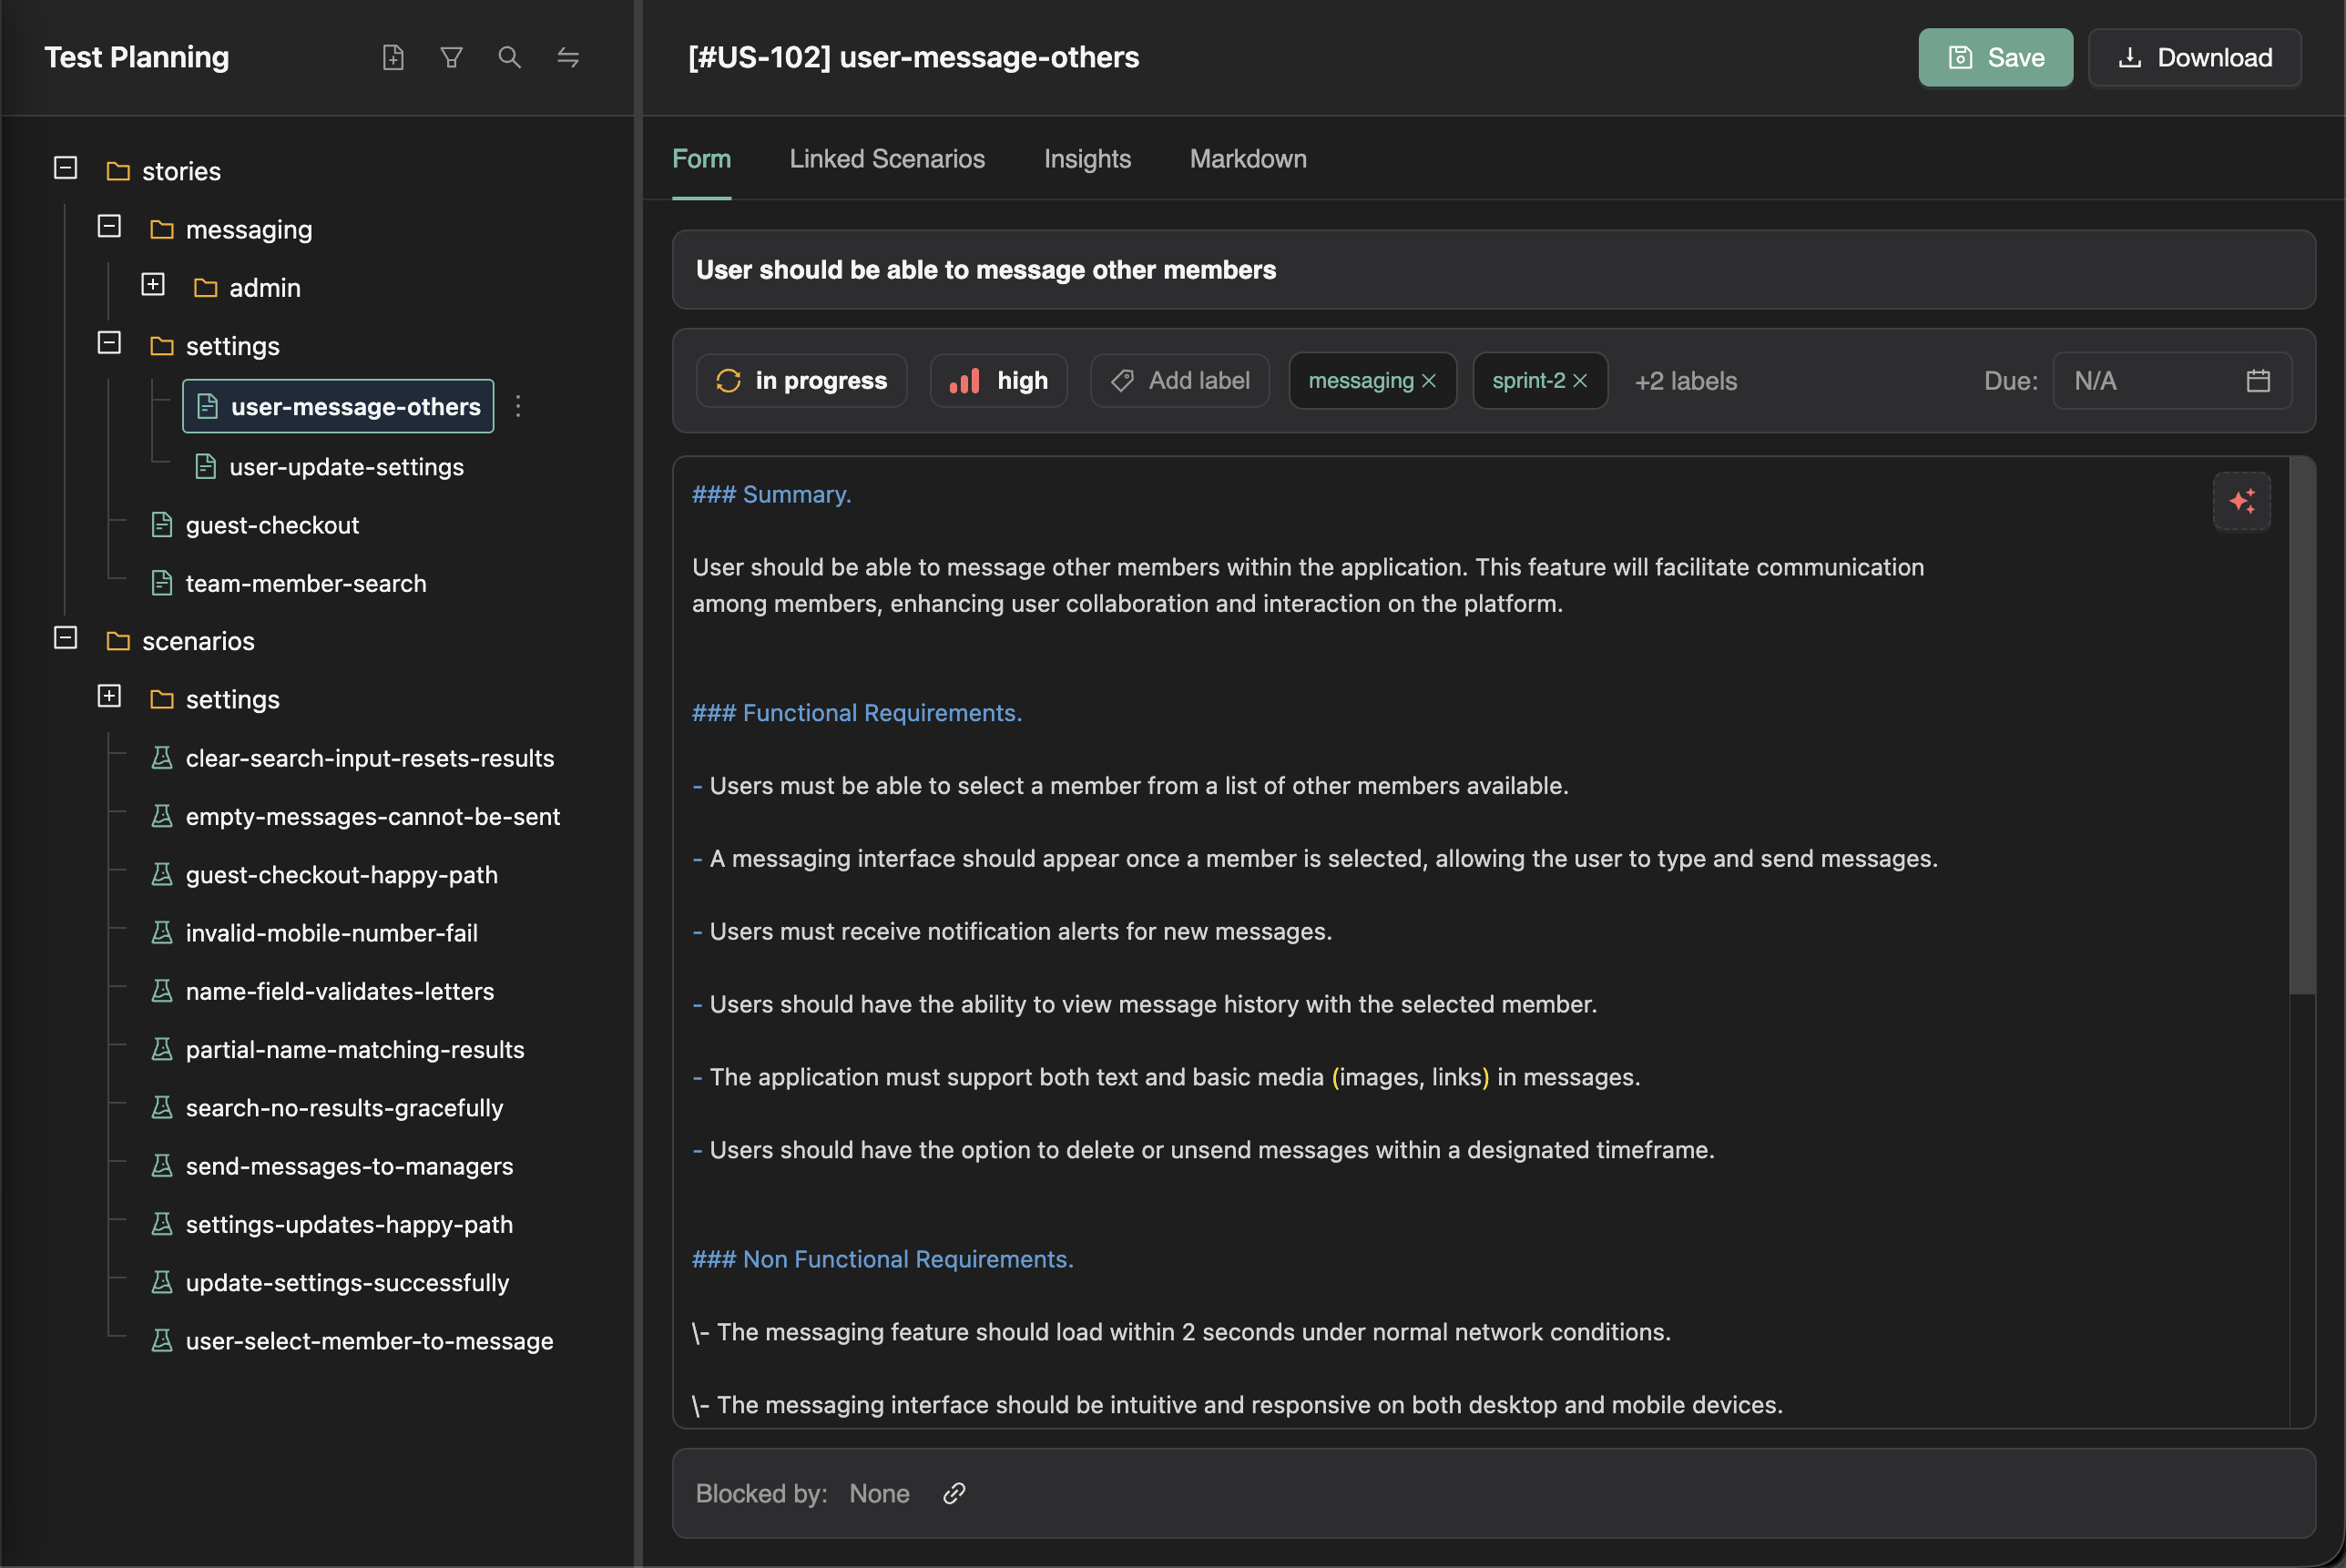
User stories in TestChimp are markdown files with structured frontmatter, allowing you to maintain detailed requirements that are both human-readable and machine-parseable. The platform provides a rich form-based interface for authoring, with AI assistance that leverages your full application context.
Creating a User Story
From the Test Planning Explorer
- Navigate to Test Planning in the main navigation
- In the explorer pane, right-click on a folder under stories (or the stories root)
- Select New Story
- Enter a title for your user story
- The story form opens for detailed authoring
Story Fields
Each user story includes the following fields:
| Field | Description |
|---|---|
| Title | A concise, descriptive name for the user story |
| Description | The detailed user story content, typically in "As a... I want... So that..." format |
| Priority | Importance level (e.g., High, Medium, Low) |
| Status | Workflow state (e.g., Draft, In Review, Approved) |
| Labels | Tags for categorization and filtering |
| Due Date | Target completion date |
| Acceptance Criteria | Specific conditions that must be met |
The Form View
The Form tab provides structured fields for each story attribute:
- Text inputs for title and description
- Dropdowns for priority and status
- Tag input for labels
- Date picker for due date
- Rich text area for acceptance criteria
The Markdown View
Switch to the Markdown tab to see the raw markdown representation:
---
title: User Login with Email
priority: high
status: draft
labels:
  - authentication
  - core-flow
due_date: 2024-02-15
---

## Description

As a registered user, I want to log in using my email and password
so that I can access my personalized dashboard.

## Acceptance Criteria

- [ ] Email field validates proper email format
- [ ] Password field masks input
- [ ] "Forgot Password" link is visible
- [ ] Invalid credentials show clear error message
- [ ] Successful login redirects to dashboard
- [ ] "Remember me" option persists session
AI-Assisted Authoring
The "Write for Me" Feature
TestChimp can generate detailed user stories using AI that understands your application:
- Enter a title for your story (e.g., "User Password Reset")
- Click "Write for Me"
- TestChimp generates a comprehensive user story including:
- Detailed description
- Acceptance criteria
- Edge cases to consider
- Related user flows
How AI Context Works
Unlike generic AI tools, TestChimp's story generation is informed by:
- Your application's structure: The Atlas SiteMap captures your app's screens and states
- Existing user stories: AI understands patterns from stories you've already authored
- Related scenarios: Linked test scenarios provide additional context
- Folder context: Stories in the same folder are considered related
This means the AI gets better as you author more stories. Each new story adds to the context, making subsequent generations more accurate and consistent.
Context Accumulation
The more you use TestChimp, the smarter it becomes:
| Context Source | What It Provides |
|---|---|
| Atlas SiteMap | Your app's screens, states, and navigation patterns |
| Existing Stories | Terminology, patterns, and domain language |
| Test Scenarios | Expected behaviors and edge cases |
| Folder Organization | Feature boundaries and relationships |
Folder Organization
Organizing Stories by Feature
Create a folder structure that mirrors your application's architecture:
stories/
├── authentication/
│   ├── login.md
│   ├── registration.md
│   ├── password-reset.md
│   └── two-factor-auth.md
├── user-management/
│   ├── profile-settings.md
│   └── notification-preferences.md
└── billing/
    ├── subscription-management.md
    └── payment-methods.md
Benefits of Folder Organization
- Scoped insights: View coverage metrics for just authentication stories
- Team ownership: Assign folders to specific teams or owners
- Filtered views: Apply filters within a folder scope
- AI context: Related stories in the same folder inform generation
Creating Folders
- Right-click on an existing folder in the explorer
- Select New Folder
- Enter a name for the folder
- Stories created in this folder inherit its context
Workflow Management
Status Tracking
Track story progress through workflow states:
- Draft: Initial creation, still being written
- In Review: Ready for stakeholder review
- Approved: Signed off and ready for implementation
- Implemented: Development complete
- Deprecated: No longer relevant
Priority Levels
Prioritize your backlog effectively:
- Critical: Must be addressed immediately
- High: Important for upcoming release
- Medium: Standard priority
- Low: Nice to have, can be deferred
Labels for Cross-Cutting Concerns
Use labels to categorize stories across folders:
- Feature labels:
authentication,checkout,reporting - Technical labels:
api-change,database-migration - Sprint labels:
sprint-42,q1-release
Best Practices
Writing Effective User Stories
- Start with the user: Use "As a [role], I want [feature], so that [benefit]"
- Be specific: Include concrete acceptance criteria
- Keep scope manageable: One story should be completable in a sprint
- Include edge cases: Document what happens when things go wrong
Leveraging AI Effectively
- Start with a clear title: A good title guides the AI generation
- Review and refine: AI-generated content is a starting point, not final
- Build context gradually: Each authored story improves future generations
- Use folder organization: Place related stories together for better context
Maintaining Quality
- Review regularly: Keep stories up-to-date with application changes
- Archive outdated stories: Move deprecated stories to an archive folder
- Link scenarios: Connect stories to their test scenarios for traceability
- Use consistent terminology: Establish naming conventions for your team
Next Steps
Once you have user stories authored:
- Link test scenarios — Create scenarios that validate your stories
- Export to Git — Sync stories to your repository
- Track coverage — Monitor test coverage at the folder level
FAQ
What metadata can stories include?
Title, priority, status, labels, owners, due dates, and custom fields in YAML frontmatter above human-readable acceptance criteria.
How do stories relate to scenarios?
Stories live in folder hierarchies; scenarios drill into testable flows under each story for traceability and SmartTest linking.
Can agents author stories?
Yes—Claude with the TestChimp skill can draft or update story markdown via MCP and Git sync when scoped to a feature or PR.